Thursday, November 10, 2016

Flipping Your College Classroom - Installment #2 - Defining the Purpose and Designing In-Class Activities


Installment #2
In-class Activities

In my previous post, Installment #1, I covered how you can begin flipping your course by starting with one one lesson and breaking it down into four parts: 1) the purpose; 2) the prior-to-class activities; 3) the in-class activities; and 4) the closing. I began by focusing on suggestions for the prior-to-class activities.

In this second installment, I'd like to back up a bit and discuss the first part -- "the purpose."  Before you can begin to design activities and assessment for the lesson, you need to define the purpose of the lesson. Students need to know the goal -- what should they be able to do by the end of the lesson? Remember to focus on this one lesson, not the entire course.  "Fill in the blank: By the end of this lesson, students will be able to _____________ (Honeycutt, p17)." Be specific and remember that the goal should be measurable.

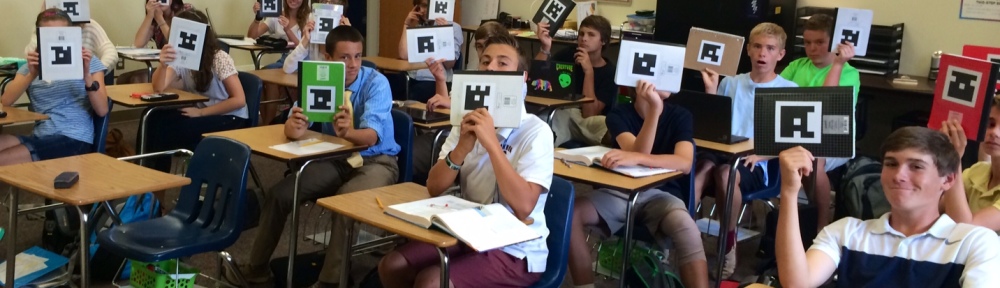
So now, I'd like to move on to the third part, the in-class activities. What will your students be doing in class? Activities should be designed so that students are analyzing, evaluating, or creating. What tools will they be using? Will they be working in pairs or groups? Will they be using laptops, tablets, textbooks, or handouts? If they are working in pairs or groups, how will the groups share their outcomes?  Below, are two strategies that integrate reflection in a flipped lesson.

Think, write, share:  Ask students to think about a question or problem first and after a few minutes, give them time to write or draw their ideas. After that, allow time for sharing in pairs or small groups, and then perhaps with the entire class (Honeycutt, p57). 

Technology tools for this activity may include:

  1. Each group reports back to the class using the document camera to display their group's drawing or written summary to the in-room projector or HDTV screen.
  2. Students work on laptops or tablets and share their screens using WebEx.
  3. Use Google Keep to have groups share their work. They can share images, notes, and lists.
  4. Groups work together to create Google Docs, Sheets, or Drawings and share them with the instructor, who displays them to the class.
  5. If the room has ample physical whiteboard space, have each group report by writing on a section of the board. This can be done digitally by using Google Drawings or the WebEx whiteboard feature.

Index card activity:  Students are given an index card to write one question they have from the pre-class work or from the previous lesson. Give them time to think and review their notes and then collect the cards and put students into groups. Shuffle the deck of cards and give a stack to each group. Each group member reviews a card and writes a response on the back of the card. Finally, each student shares the question and answer on their index card with their group (Honeycut, p58).

Technology tools for this activity may include:
  1. Use Google Keep and create group folders. The students each create a note within the folder and write their question and then ask another group member to answer their question within the note. Then each note is discussed by the group.
  2. The instructor creates a Google Drive Folder for each group and shares each folder with the designated groups (with editing rights). Each student then creates a Doc in their shared group's folder and writes one question. Assign students to write their answer to another student's question, and then the group discusses each question.
In the next installment in this series, I will discuss assessing learning in the flipped classroom.

Friday, November 4, 2016

Flipping Your College Classroom - Installment #1 - Start with one lesson

Installment #1

This post begins a series of posts about flipping your college classroom.

The FLIP:  "Focus on your Learners by Involving them in the Process"
Barbi Honeycutt, PhD

"The FLIP is when you intentionally invert the design of a learning environment so students engage in activities, apply concepts, and focus on higher level learning processes during class (Honeycutt 2012)."

I recently purchased the book, "Flipping the College Classroom: Practical Advice from Faculty" by Barbi Honeycutt, PhD. 2016, Magna Publications, ISBN: 978-0-912150-28-4

If you are interested in reading this book, please let me know.  Since I am an academic technologist, my work involves consulting with faculty, providing coaching and training, and investigating new trends in technology for teaching and learning and emerging technologies. I thought that I might attempt to highlight a few of the key points from the book and offer my thoughts about integrating some specific technology tools for flipping your course.

Start with one lesson:

Break the lesson down into four parts:

1) the purpose
2) the prior-to-class activities
3) the in-class activities
4) the closing

Let's focus on the prior-to-class activities first.  "You need to have a strategy for holding students accountable for completing the prior-to-class work (Honeycutt, p18)."

In order to hold students accountable for actually completing the prior-to-class work, for example if they were assigned to view a video, here are some assessment techniques that you could use.

If they were assigned to view a video, there are various tools available that enable you to embed quiz questions within the video.
Other assessment methods include:
  1. Asking students to write a one-minute paper upon arrival at class to summarize key points from the video.
  2. Assigning students to post to Q&A Moodle forum and ask 2-3 questions about the material covered in the video. This forum type requires students to first post their answers to the questions before they are allowed to view other students' posts.
  3. Creating a Moodle Quiz that students need to complete prior to class.
The next installment in this series of posts will pick up where this one left off, and I will cover my suggestions for in-class activities.


Tuesday, August 16, 2016

A New Academic Year Begins With "Teaching With Technology" Faculty Workshop

I absolutely love this time of year! After a summer of catch-up, investigating new technologies for teaching, and attending professional development conferences, I am anxious to connect with new and returning faculty!

One way that I have been able to set things off for the new academic year at UMM, is to hold a faculty Teaching With Technology workshop the very first week that faculty report to work for Fall Semester.

Here is the flyer for the August 18th Teaching With Technology Workshop:


Topics covered include:

  • Using Moodle Forums for Announcements and "Ask Me" resource
  • Using a Google Doc as a "Living" Syllabus
  • Using Google Calendar for Student Sign-up of Appointment Slots
  • Using Flipgrid for student introductions and interaction
  • Using a Google Doc as a Classroom Backchannel
  • Making Google Docs Accessible
  • Using Google Keep for Group Research Projects
  • Using Student Response Systems: from low tech to Moodle-integrated
  • Tracking Student Attendance and Participation in Moodle
  • Creating easy & quick videos within Moodle (create student video assignments as well)
  • Holding virtual office hours with Web/Video conferencing (WebEx Personal Meeting Room)
  • Recording lecture videos in WebEx and linking them to your Moodle course
  • Sharing and collaboration - students sharing their device screens in class using WebEx
  • Implementing effective Moodle course site design via the Morris Moodle Course Template


Friday, April 29, 2016

Thorough and Efficient Education - Video Lectures

Dr. Lodge McCammon:

"My lecture videos are always available to my students. They can re-watch them anywhere, anytime & as many times as they need in order to process the information. There is no need to ever repeat it live in the classroom. The average length of my video lectures is 15 minutes. If I show them during class, in periods 1 2 and 3, that would take a total of 45 minutes. 

There are 60 topics. That’s 2,700 minutes of lecture video viewing in the classroom. These videos save me from 9,900 minutes of exhausting repetition...but more importantly, they allow me to free up 9,900 minutes every semester that I can used to personalize instruction.

I use my lecture videos & these active learning strategies to provide a thorough & efficient education for all of my students."


Friday, April 15, 2016

Provide video feedback to students while you are walking them through their paper


Screencast-O-Matic

Screencasting, or capturing what you do on your computer or tablet in a video format while you narrate your actions, is one of the many benefits modern computer technology has provided to today’s educators.
There are numerous free screencasting tools available, and one of the longest standing mainstays is Screencast-O-Matic. You can use it as a web app, or download a version for your PC or Mac. The free version of the tool limits you to 15 minute videos and does not permit editing (but you can get editing and unlimited video length for a meager $15 a year! -- or talk to Pam about getting this for free for course-related use).
Screencasting can be used to do so many things! Here’s a few ideas for different ways you can use screencasting for teaching:
  • Open a picture, or several pictures, and talk about them. Maybe you want to share the works of a favorite artist or photographer, or pictures of some geographic area, or something scientific.
  • Open a document and discuss it – a section of an ebook, a paper, an article, whatever!
  • Navigate a favorite web site and explain what’s available there – this could be a museum’s online site, a science site, a news resource, or one of so many other awesome online resources.
  • The old classic … narrate over a Powerpoint slide deck you use to deliver a lesson in class.
  • Show students how to solve a math problem (you can use a tool you draw on, like MS Paint or Educreations).
The ways you can use screencasting for teaching are truly unlimited!

Thursday, April 7, 2016

Blended Learning vs Flipping Learning


 By Halina OstaƄkowicz- Bazan (posted to Academia 4/7/16)

According to Horn and Staker, blended learning is:
Any time a student learns, at least in part, at a supervised brick-and-mortar location away from home and, at least in part, through online delivery with some element of student control over time, place, path, and/or pace. The modalities along each student’s learning path within a course or subject are connected to provide an integrated learning experience.
The most significant piece of the definition is the “element of student control” highlighting the flowing instructional models to enable improved student-centered learning, giving students greater than before control over the time, place, path, and/or the step of their learning tracks.
Blended learning offers a balanced approach, focused on redesigning instructional models first, then applying technology, not as the driver, but as the supporter, for high-quality learning experiences that allow a teacher to personalize and make the most of the learning.
The technology helps to supply instructors with data, expand student choices for educational resources and learning materials, and deliver opportunities for students to practice and to exhibit the high-character performance.
Broadly speaking, I am for blended learning, which means taking advantage of both traditional f2f techniques and possibilities presented by new technologies.
Flipped Classrooms generally provides pre-recorded material (video or audio) followed by classroom activities. Learners watch the video before or after the class, this happens outside F2F meetings. Thank’s to that classroom time can be used for interaction, such as Q@A sessions, discussions, exercises other learning activities.
This is the perfect way to “invert” doings in the class with activities outside the teaching space.
Flipping is not just about video and technology.
Moreover, technology does not replace good teaching. It enhances good teaching.
Flipping helps us to get the best use of class time. It is a methodology that permits the instructor to involve students intensely in the collaborative community and produce a shared problem-solving workshop.
Sometimes, instead of giving lectures, I call for scholars to watch chosen PPT, videos or podcasts at home, so when we gather in the course of work, we are able to concentrate on the debate, as well as interpretation of the problem.
In my point of view, there are some significant ways to involve students during a lecture such as short demonstrations, surveyed by group debate as well as PPT lecture, followed by expounding, discussing and particularizing the material.
I am convinced that dialogue is necessary for my Polish History and Culture lectures. I take advantage of novel methods to build up active learning skills and to encourage students toward further learning, or else to mature students' thinking skills. For most of my learners, the techniques I use are fresh. They come to study in Poland from all the Globe and the majority of them are not used to blended learning as well as flipped classes.
Flipping provides students opportunities such as; interactive questioning, mind exploration, answer “why this is important for me to recognize this?” and student-created content.
During my language classes, I also use flipped methods because I believe in learning by researching as well as having fun while studying.
Wolff, Lutz-Christian, and Jenny Chan. "Defining Flipped Classrooms. “Flipped Classrooms for Legal Education. Springer Singapore, 2016. 9-13.

http://www.christenseninstitute.org/blended-learning/

Wednesday, April 6, 2016

Flipping Your Course

In its simplest terms, the flipped classroom is about viewing and/or listening to lectures during one’s own time which frees up face-to-face class time for experiential exercises, group discussion, and question and answer sessions.
It’s called “the flipped classroom.” While there is no one model, the core idea is to flip the common instructional approach.  With teacher-created videos and interactive lessons, instruction that used to occur in class is now accessed at home, in advance of class. Class becomes the place to work through problems, advance concepts, and engage in collaborative learning. Most importantly, all aspects of instruction can be rethought to best maximize the scarcest learning resource—time. Flipped classroom teachers almost universally agree that it’s not the instructional videos on their own, but how they are integrated into an overall approach, that makes the difference.


Many educational technology tools can be used in instruction; however, one fundamentally useful tool in teaching is the screencast. A screencast can provide learners a student-centered and engaging learning experience in both distance and traditional learning settings. Screencasts enable teachers to create a digital recording of any instructional activity performed on a computer screen, and they can be used as learning resources, learning tasks, and learning support.
The following article focuses on educational screencasts. The topics explored include an overview of screencasting, its benefits, the flipped classroom, screencast software, tools, planning, and teacher-created screencasts. 
Screencasting to Engage Learning, by Michael F. Ruffini, EDUCAUSE Review

Friday, February 26, 2016

TRY IT! Voice Typing in Google Docs

The Voice typing tool in Google Docs is new and improved. For six months, you’ve been able to type with your voice, but today you are able to use a long list of commands to do a whole lot more. Some of the new commands include adding tables, moving around to different lines of your document, and even formatting your text to align right.
To start typing your document with your voice, watch the short video below and follow these steps:
  • To turn on Voice typing, go to Tools, and then select Voice typing.
  • Next, click on the microphone that appears to the left of your document. When you click it, it will turn red and will begin recording.

Friday, February 19, 2016

Classroom Engagement with Plickers and i>Clickers: Student Response Systems

Engage ALL students in critical thinking by using a student response solution, such as Plickers (Printed Clickers) or i>Clicker remotes. Give all students the chance to participate and engage in learning without feeling self-conscious.
How To Use Clickers Effectively

Plickers 
Focus more on teaching, less on set-up. No waiting for students to log-in on a computer or even open the right app. Plickers integrates seamlessly into the way you already teach.


http://plickers.com/

Getting Started with Plickers


i>Clicker

Getting Started with i>Clicker

Teaching With Clickers


Thursday, February 4, 2016

Smartphone Video Tips

The University of Minnesota's Academic Technology Support Services created this video as a resource for a course that has a student video assignment. We thought it would be useful to faculty creating video content as well.  Tips include: 1. Get tight and focused. 2. Keep it horizontal. 3. Steady your shot. 4. Light it up. 5. Get clean audio. 6. Play it back.

Teaching Tip: Recording Class Presentations

The University of Minnesota's College of Continuing Education Media Specialists, Jill Zimmerman and Greg Steinke, are at it again. This video covers University-supported tools that can be used by their students to record presentations as an activity for class. 1) Google Hangouts On Air 2) WebEx - Web Conferencing Platform 3) VoiceThread


Resource Guide for Students: Recording Presentations